
Areas
An area belongs to a product and is a geographical feature defined by GeoJSON. Areas are used to define DRT service areas. For the area concept and the different area types, see Areas.
GeoJSON is a format for encoding collections of simple geographical features along with their non-spatial attributes using JSON. GeoJSON objects may represent a geometry, a feature, or a collection of features.
View areas
Permissions:
read_areas
From the product overview in Control Center, select Areas in the left sidebar. In this view, areas are listed in a table containing the following information.
| Column | Description |
|---|---|
| ID | Area identifier |
| Name | Area name |
| Description | Area description |
| Color | Area color as a hex code |
| Has recurrence rules? | Whether recurrence rules are set for the area |
| Occurring days of week | Weekdays with defined recurrence rules |
Create an area
Permissions:
create_areas
To create an area, select Create new and enter the following information.
- Area type. Select DRT Sub Area, Intermodal Area, Vehicle Operation Area, Served Area (Filter), Unserved Area (Filter), or Vehicle Operation Area from the dropdown menu.
- DRT Area. The DRT area is maintained by the system and not editable. It resembles the overall area where the DRT service operates and usually consists of all the DRT sub areas.
- DRT Sub Area. A DRT sub area is the most basic building block for a DRT service. It must be referenced by a matching configuration to be included in the DRT area. Every product needs at least one.
- Intermodal Area. The intermodal area is a geographic representation of the area where a passenger can start or end their journey. This area is necessary for intermodal journeys. Draw it larger than the DRT area so that it fully covers (encloses) the DRT area. Do not exclude or cut out the DRT area from it; a location inside the DRT area must also fall inside the intermodal area to be treated as public transport. As a practical guideline, keep the intermodal area to about 400 square kilometers or less. Very large or multi-town DRT areas may need a larger intermodal area, and coverage of the DRT area comes first.
- Vehicle Operation Area. A vehicle can have multiple areas of this type, or none at all. These areas are used in autonomous vehicles to store the map data available to each individual vehicle.
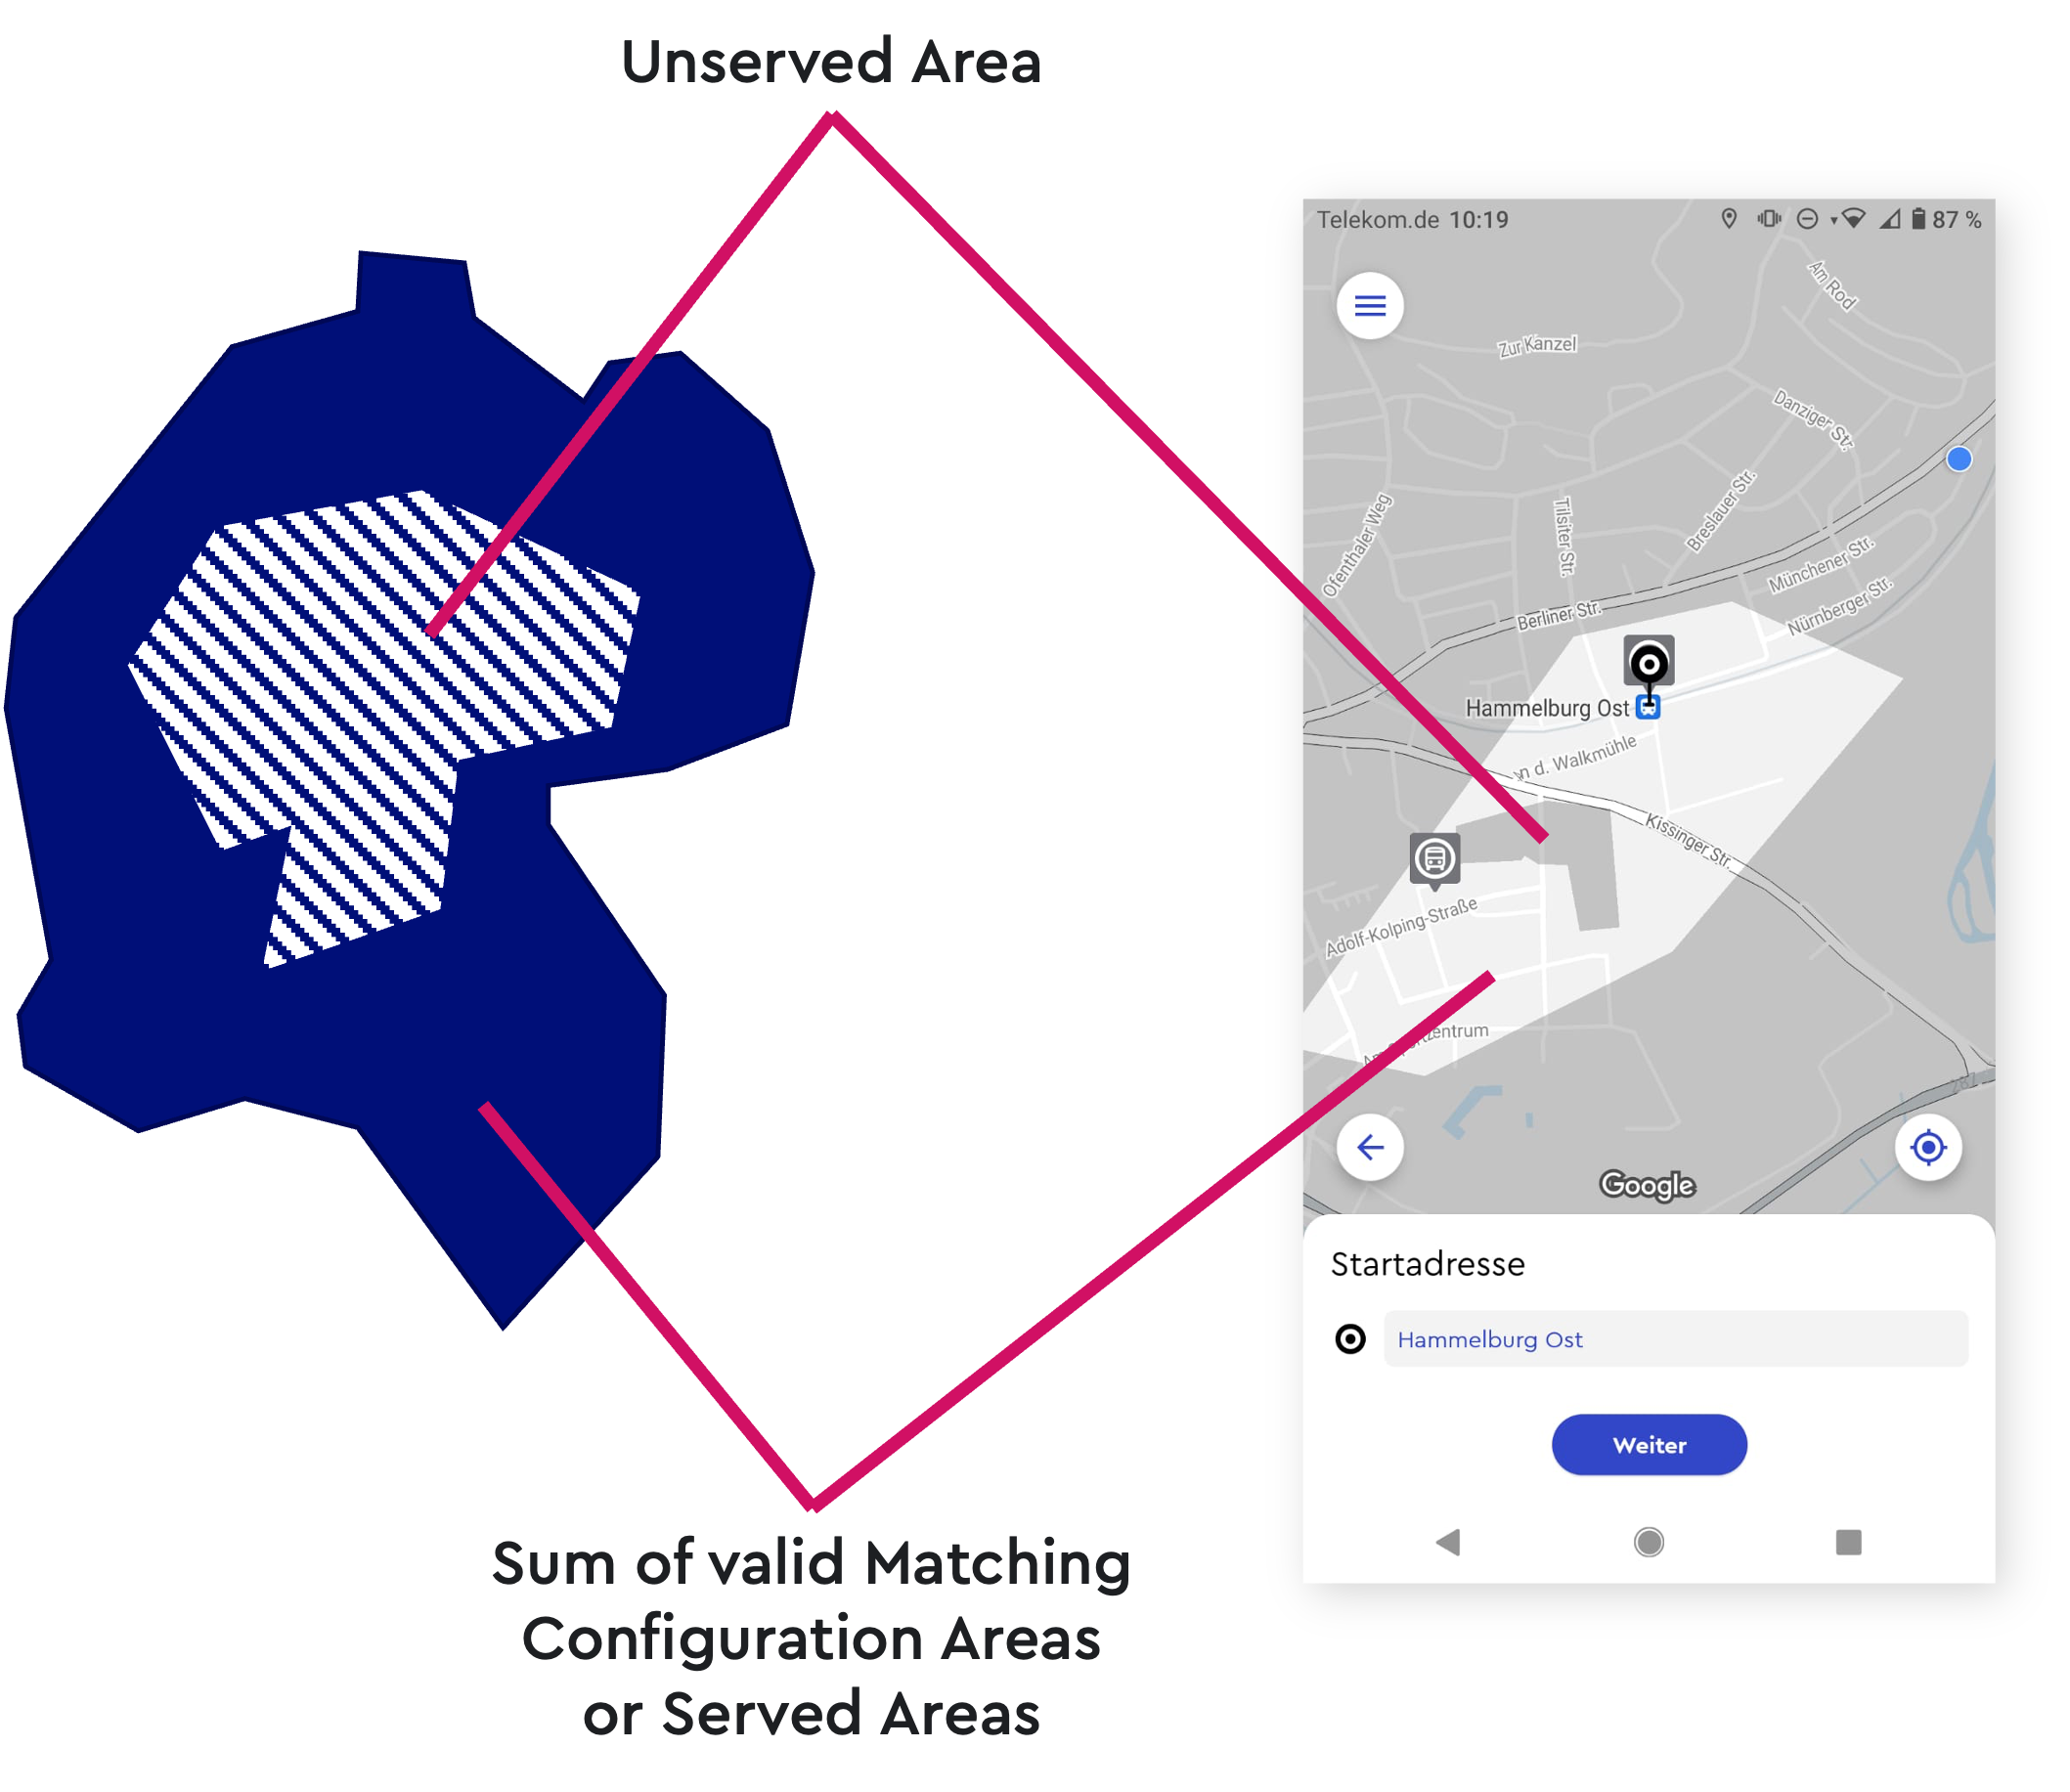
- Served Area (Filter). A served area acts as an additional filter. It is an area that also has a temporal component and requires recurrence rules. If no served area is defined, no additional filter is applied to incoming ride requests. If served areas are defined, a ride request must fit the served area both temporally and spatially.
- Unserved Area (Filter). An unserved area acts as a negative filter and are largely configured in the same way as served areas. If defined, any ride request that falls within the geographical and temporal boundaries of an unserved area will not be served. In other words, these are regions where passengers cannot be picked up. However, passengers can still book rides from within an unserved area, provided they are willing to walk to a nearby serviceable location for pickup.
What is the difference between an unserved area and a restricted area?
Unserved areas are regions where passengers cannot be picked up. However, passengers can still book a ride starting from these areas, as long as they walk to a nearby serviceable location for pickup.
Restricted areas are regions that vehicles are not allowed to enter or pass through. Routing will always avoid these areas, meaning no driving or pickups are possible within them.
- Name. Enter the name of the area.
- Slug. Enter the slug of the area. In general, slugs serve as unique identifiers that are used to reliably identify resources. Slugs may only contain lowercase letters (a–z), numbers (0–9), underscores (_), and hyphens (-). Spaces, uppercase letters, and special characters are not allowed.
- Description (optional)
- Area GeoJSON
The Area GeoJSON field supports “Polygon” or “Multipolygon” types and their corresponding “FeatureCollections.” “LineStrings” are not accepted. Creating a GeoJSON requires no specialized software; you can accomplish this easily using an open-source website.
Follow these steps:
- Visit geojson.io. Use the search field in the upper right-hand corner or zoom into the map section where your service area will be located.
- Click on the icon “Draw a polygon” located on the top right.
- Define your service area point by point. Connect the start and end dots to complete the polygon. Ensure the drawing does not exceed 1,000 waypoints to prevent delays in loading the app and Control Center. Draw the outer border of your area counterclockwise and the borders of any holes clockwise. Control Center rejects areas drawn in the other direction. Validate your GeoJSON file’s correctness using geojsonlint.com. If you have multiple areas that should share the same matching configuration, you can include them in a single GeoJSON. Ensure that the borders of these areas do not touch each other to maintain their distinct boundaries.
- Once finished, copy and paste the JSON into the Area GeoJSON field.
To leave out a part of an area, such as a district inside the service area, cut a hole into the area. Ride requests inside the hole are outside the area. If vehicles must not drive through that part, use a restricted area instead. If passengers must not be picked up there but may walk to a nearby pickup location, use an unserved area instead.
geojson.io does not draw holes directly. To create an area with a hole in geojson.io, follow these steps:
- Draw the outer border of the area as a polygon.
- Draw the hole as a second polygon inside the first one.
- Select the outer polygon.
- Hold Shift and select the inner polygon.
- In the toolbar, open the Union features dropdown and select Subtract.
geojson.io replaces both polygons with one polygon that contains the hole. The outer border runs counterclockwise and the hole runs clockwise, so you do not need to correct the direction.
I have a GeoJSON with tens of thousands of points and excessive coordinate precision. How can I simplify it and export it with 6 decimal places to improve performance?
- Open mapshaper.org in your web browser.
- Import your GeoJSON file by dragging and dropping it into the page or by clicking the Select button and choosing your file.
- Simplify the geometry by selecting Simplify button in the top toolbar and adjusting the slider to your desired level of detail reduction.
- Select Export in the top toolbar to open the export pane.
- Enter
precision=0.000001in the command line options field in the export pane.- Select Export in the export pane to download the simplified GeoJSON file.
Why does Control Center show the error “Reason ‘Nested shells’” when I save an area?
The GeoJSON contains a polygon that lies completely inside another polygon. Control Center combines all polygons in a GeoJSON into one
MultiPolygon, and aMultiPolygonmust not contain a polygon inside another one. This usually happens when you try to cut a hole into an area by drawing a second polygon inside the first one. A polygon drawn in geojson.io is saved as a separate feature, not as a hole.To fix the error, do one of the following:
- If you do not need the inner polygon, delete it.
- If the inner polygon is meant to be a hole, subtract it from the outer polygon in geojson.io, as described in the tip about holes above.
You can also add a hole by editing the JSON. Add the coordinate list of the hole as a second entry in the
coordinatesof the outer polygon. The first list is the outer border (counterclockwise) and the second list is the hole (clockwise). Each list must end with the same point that it starts with.{ "type": "Polygon", "coordinates": [ [[lon, lat], ...], [[lon, lat], ...] ] }
Visualization
- Color (default =
#000000): Enter a string in Hex RGB notation to specify the boundary color of the area. It has a preceding ‘#’ followed by four two-digit hex codes for red, green, blue, and alpha values.
If the color is defined as
#FF0000, this will be rendered as solid red.
Opacity (default = 0.5): Enter a floating-point number between 0.0 and 1.0 (inclusive). This controls the transparency of the boundary of the area.
0.0means no opacity — that is, fully transparent — whereas1.0means full opacity.Stroke weight (default = 1): Enter a non-negative integer to specify the width in pixels used for the outline of the area.
Fill color (default =
#000000): Enter a string in Hex RGB notation to specify the fill of the area.Fill opacity (default = 0.1): Enter a floating-point number between 0.0 and 1.0 (inclusive). This controls the transparency of the fill of the area.
z-index (default = 0): Enter a z-index. In UI contexts, a z-index is a property that determines the stacking order of elements that overlap. Elements with a higher z-index value appear in front of elements with lower z-index values, much like layers in a stack. Apps use this value when rendering the area polygons.
Legend index (default = 0): Enter the legend index. This is used to determine the order of the area when fetching via API and the position in the legend if an app visualizes this.
Invert (default = false): Select this option if apps should invert the polygon when visualizing the area. This means that the area colored by the fill color should be outside of the polygon as opposed to inside.
Legend Title
Enter the legend title of the area. This is recommended to be short, ideally only one word.
Legend Description
Enter the detailed description of the journey.
Optional recurrence rules
To add an optional recurrence rule to either a Served Area or Unserved Area, select Add recurrence rule and enter the following information.
- Day of week. Select a day of week from the dropdown menu.
- Valid from. Enter a time when the recurrence rule starts.
- Valid until. Enter a time when the recurrence rule ends.
Selecting All day changes Valid until to 24:00. To copy a recurrence rule to the bottom of the list, select Copy.
Time-dependent Served and Unserved Areas are independent from vehicle plannings and matching configurations.
Unserved area
The following urban area (shaded) below can be temporarily excluded from matching and only be enabled for your DRT service at night. This allows an easy, long-term planning and design of your service.
Open the detailed view of an area
Permissions:
read_areas
To open the detailed view of an area, select ⚙️ > Show in the dropdown menu. Alternatively, select its name in the table.
The following tabs are shown in the detailed view.
Overview
This tab provides an overview of the area details and shows its location on a map.
Inspect
This tab displays a technical summary of the attributes of the area.
Edit an area
Permissions:
update_areas
To edit an area, select ⚙️ > Edit in the dropdown menu. Make the desired changes and then select Save.
Delete an area
Permissions:
delete_areas
To delete an area, select ⚙️ > Delete in the dropdown menu and then OK.